AppBar作为Android5.0的重要动画效果, 非常绚丽的UI, 通过内容驱动, 可以减少页面的访问, 更加便捷的传递主题思想. 那么我们看看如何使用.
本文源码的GitHub下载地址
欢迎Follow我的GitHub: https://github.com/SpikeKing
配置
创建一个Navigation Drawer的工程, 修改主题颜色.1
2
3
4
5<resources>
<color name="colorPrimary">#FF1493</color>
<color name="colorPrimaryDark">#FF1493</color>
<color name="colorAccent">#FF4081</color>
</resources>
修改抽屉的渐变颜色side_nav_bar.xml1
2
3
4
5
6
7
8
9<shape xmlns:android="http://schemas.android.com/apk/res/android"
android:shape="rectangle" >
<gradient
android:startColor="#FF34"
android:centerColor="#FF3E96"
android:endColor="#FF1493"
android:type="linear"
android:angle="135"/>
</shape>
ViewPager
修改app_bar_main.xml, 在CoordinatorLayout中添加ViewPager.1
2
3
4
5<android.support.v4.view.ViewPager
android:id="@+id/main_vp_container"
android:layout_width="match_parent"
android:layout_height="match_parent"
app:layout_behavior="@string/appbar_scrolling_view_behavior"/>
设置ViewPager的Fragment内容1
2
3
4
5
6
7
8
9
10
11
12
13
14
15
16
17
18
19
20
21
22
23
24
25
26
27
28
29
30
31
32
33
34
35
36
37
38
39
40/**
* 简单的Fragment
* <p/>
* Created by wangchenlong on 15/11/9.
*/
public class SimpleFragment extends Fragment {
private static final String ARG_SELECTION_NUM = "arg_selection_num";
(R.id.main_tv_text) TextView mTvText;
public SimpleFragment() {
}
public static SimpleFragment newInstance(int selectionNum) {
SimpleFragment simpleFragment = new SimpleFragment();
Bundle args = new Bundle();
args.putInt(ARG_SELECTION_NUM, selectionNum);
simpleFragment.setArguments(args);
return simpleFragment;
}
public View onCreateView(LayoutInflater inflater, @Nullable ViewGroup container, @Nullable Bundle savedInstanceState) {
View view = inflater.inflate(R.layout.fragment_main, container, false);
ButterKnife.bind(this, view);
return view;
}
public void onViewCreated(View view, @Nullable Bundle savedInstanceState) {
super.onViewCreated(view, savedInstanceState);
mTvText.setText("Page " + String.valueOf(getArguments().getInt(ARG_SELECTION_NUM)));
}
public void onDestroyView() {
super.onDestroyView();
ButterKnife.unbind(this);
}
}
设置ViewPager的适配器1
2
3
4
5
6
7
8
9
10
11
12
13
14
15
16
17
18
19
20
21
22
23
24
25
26
27
28/**
* ViewPager的适配器
* <p/>
* Created by wangchenlong on 15/11/9.
*/
public class SimpleAdapter extends FragmentPagerAdapter {
private static final String[] TITLE = {"SELECTION 1", "SELECTION 2", "SELECTION 3"};
public SimpleAdapter(FragmentManager fm) {
super(fm);
}
public Fragment getItem(int position) {
return SimpleFragment.newInstance(position + 1);
}
public int getCount() {
return TITLE.length;
}
public CharSequence getPageTitle(int position) {
if (position >= 0 && position < TITLE.length) {
return TITLE[position];
}
return null;
}
}
在MainActivity中添加ViewPager逻辑1
mVpContainer.setAdapter(new SimpleAdapter(getSupportFragmentManager()));
AppBarLayout
修改AppBarLayout, 添加CollapsingToolbarLayout.1
2
3
4
5
6
7
8
9
10
11
12
13
14
15
16
17
18
19
20
21
22
23
24
25
26
27
28
29
30
31
32
33
34<android.support.design.widget.AppBarLayout
android:layout_width="match_parent"
android:layout_height="wrap_content"
android:fitsSystemWindows="true"
android:theme="@style/AppTheme.AppBarOverlay">
<android.support.design.widget.CollapsingToolbarLayout
android:layout_width="match_parent"
android:layout_height="400dp"
android:fitsSystemWindows="true"
app:contentScrim="?attr/colorPrimary"
app:expandedTitleMarginStart="16dp"
app:expandedTitleMarginEnd="16dp"
app:layout_scrollFlags="scroll|exitUntilCollapsed">
<ImageView
android:id="@+id/toolbar_iv_image"
android:layout_width="match_parent"
android:layout_height="match_parent"
android:adjustViewBounds="true"
android:contentDescription="@null"
android:fitsSystemWindows="true"
android:scaleType="centerCrop"
android:src="@drawable/taeyeon"
app:layout_collapseMode="parallax"/>
<android.support.v7.widget.Toolbar
android:id="@+id/toolbar"
android:layout_width="match_parent"
android:layout_height="?attr/actionBarSize"
app:layout_collapseMode="pin"
app:popupTheme="@style/AppTheme.PopupOverlay"/>
</android.support.design.widget.CollapsingToolbarLayout>
删除Toolbar的background颜色, 避免Toolbar挡住图片;
AppBarLayout设置fitsSystemWindows覆盖StatusBar背景;
CollapsingToolbarLayout包含图片和Toolbar.
TabLayout
在AppBarLayout中, 添加TabLayout1
2
3
4
5
6<android.support.design.widget.TabLayout
android:id="@+id/toolbar_tl_tab"
android:layout_width="match_parent"
android:layout_height="?attr/actionBarSize"
android:layout_gravity="bottom"
app:layout_scrollFlags="scroll"/>
TabLayout添加
layout_scrollFlags确保滑动.
把ViewPager加入TabLayout1
mTlTab.setupWithViewPager(mVpContainer);
基本功能已经完成, 再添加随着页面切换AppBarLayout的图片视图.
渐变效果
在图片视图中, 再添加一层图片, 模拟渐变动画.1
2
3
4
5
6
7
8
9
10
11
12
13
14
15
16
17
18
19
20
21
22
23
24
25
26<FrameLayout
android:layout_width="match_parent"
android:layout_height="match_parent"
android:fitsSystemWindows="true"
app:layout_collapseMode="parallax">
<ImageView
android:id="@+id/toolbar_iv_outgoing"
android:layout_width="match_parent"
android:layout_height="match_parent"
android:adjustViewBounds="true"
android:contentDescription="@null"
android:scaleType="centerCrop"
android:visibility="gone"/>
<ImageView
android:id="@+id/toolbar_iv_image"
android:layout_width="match_parent"
android:layout_height="match_parent"
android:adjustViewBounds="true"
android:contentDescription="@null"
android:fitsSystemWindows="true"
android:scaleType="centerCrop"
android:src="@drawable/tiffany"
app:layout_collapseMode="parallax"/>
</FrameLayout>
修改Adapter, 为每个页面添加一个图片1
2
3
4
5
6
7
8
9
10
11
12
13
14
15
16
17
18
19
20
21
22
23
24
25
26
27
28
29
30
31
32
33
34
35
36
37
38
39
40
41
42
43
44
45
46
47
48
49
50
51
52
53
54
55
56
57
58/**
* ViewPager的适配器
* <p/>
* Created by wangchenlong on 15/11/9.
*/
public class SimpleAdapter extends FragmentPagerAdapter {
private static final Section[] SECTIONS = {
new Section("Tiffany", R.drawable.tiffany),
new Section("Taeyeon", R.drawable.taeyeon),
new Section("Yoona", R.drawable.yoona)
};
public SimpleAdapter(FragmentManager fm) {
super(fm);
}
public Fragment getItem(int position) {
return SimpleFragment.newInstance(position + 1);
}
public int getCount() {
return SECTIONS.length;
}
public CharSequence getPageTitle(int position) {
if (position >= 0 && position < SECTIONS.length) {
return SECTIONS[position].getTitle();
}
return null;
}
public int getDrawable(int position) {
if (position >= 0 && position < SECTIONS.length) {
return SECTIONS[position].getDrawable();
}
return -1;
}
private static final class Section {
private final String mTitle; // 标题
private final int mDrawable; // 图片
public Section(String title, int drawable) {
mTitle = title;
mDrawable = drawable;
}
public String getTitle() {
return mTitle;
}
public int getDrawable() {
return mDrawable;
}
}
}
两个图像页面的渐变动画1
2
3
4
5
6
7
8
9
10
11
12
13
14
15
16
17
18
19
20
21
22
23
24
25
26
27
28
29
30
31
32
33
34
35
36
37
38
39
40
41
42
43
44
45
46
47
48
49
50
51
52
53
54
55
56
57
58
59
60
61
62
63
64
65
66
67
68
69/**
* 渐变的动画效果
* <p/>
* Created by wangchenlong on 15/11/9.
*/
public class ImageAnimator {
private final SimpleAdapter mAdapter; // 适配器
private final ImageView mTargetImage; // 原始图片
private final ImageView mOutgoingImage; // 渐变图片
private int mActualStart; // 实际起始位置
public ImageAnimator(SimpleAdapter adapter, ImageView targetImage, ImageView outgoingImage) {
mAdapter = adapter;
mTargetImage = targetImage;
mOutgoingImage = outgoingImage;
}
/**
* 启动动画, 之后选择向前或向后滑动
*
* @param startPosition 起始位置
* @param endPosition 终止位置
*/
public void start(int startPosition, int endPosition) {
mActualStart = startPosition;
// 终止位置的图片
int incomeId = mAdapter.getDrawable(endPosition);
// 原始图片
mOutgoingImage.setImageDrawable(mTargetImage.getDrawable()); // 原始的图片
mOutgoingImage.setVisibility(View.VISIBLE);
mOutgoingImage.setAlpha(1.0f);
// 目标图片
mTargetImage.setImageResource(incomeId);
}
/**
* 滑动结束的动画效果
*
* @param endPosition 滑动位置
*/
public void end(int endPosition) {
int incomeId = mAdapter.getDrawable(endPosition);
mTargetImage.setTranslationX(0f);
// 设置原始图片
if (endPosition == mActualStart) {
mTargetImage.setImageDrawable(mOutgoingImage.getDrawable());
} else {
mTargetImage.setImageResource(incomeId);
mTargetImage.setAlpha(1f);
mOutgoingImage.setVisibility(View.GONE);
}
}
// 向后滚动, 比如0->1, offset滚动的距离(0->1), 目标渐渐淡出
public void forward(float positionOffset) {
mTargetImage.setAlpha(positionOffset);
}
// 向前滚动, 比如1->0, offset滚动的距离(1->0), 目标渐渐淡出
public void backwards(float positionOffset) {
mTargetImage.setAlpha(1 - positionOffset);
}
}
注释已经写的很详细了, 注意的是向前向后滑动, position的值不同. 向前滑动, position的值是当前值减一; 向后滑动, position的值不变. 也就是说, position总是较小值. 偏移量, 向后滑动时, 从0至1; 向前滑动时, 从1至0.
ViewPager的监听, 使用动画效果1
2
3
4
5
6
7
8
9
10
11
12
13
14
15
16
17
18
19
20
21
22
23
24
25
26
27
28
29
30
31
32
33
34
35
36
37
38
39
40
41
42
43
44
45
46
47
48
49
50
51
52
53
54
55
56
57
58
59
60
61
62
63
64
65
66
67
68
69
70
71
72
73
74
75
76
77
78
79
80
81
82
83
84
85
86
87
88
89
90
91
92
93
94
95
96
97
98
99
100
101
102
103
104
105
106
107
108
109
110
111
112
113
114
115
116
117
118
119
120
121
122
123
124
125
126
127
128
129
130
131
132
133
134
135
136
137
138
139
140
141
142
143
144
145
146
147
148
149
150
151
152
153/**
* ViewPager滑动页面监听
* <p/>
* Created by wangchenlong on 15/11/9.
*/
public class PagerChangeListener implements ViewPager.OnPageChangeListener {
private ImageAnimator mImageAnimator;
private int mCurrentPosition;
private int mFinalPosition;
private boolean mIsScrolling = false;
public PagerChangeListener(ImageAnimator imageAnimator) {
mImageAnimator = imageAnimator;
}
public static PagerChangeListener newInstance(SimpleAdapter adapter, ImageView originImage, ImageView outgoingImage) {
ImageAnimator imageAnimator = new ImageAnimator(adapter, originImage, outgoingImage);
return new PagerChangeListener(imageAnimator);
}
/**
* 滑动监听
*
* @param position 当前位置
* @param positionOffset 偏移[当前值+-1]
* @param positionOffsetPixels 偏移像素
*/
public void onPageScrolled(int position, float positionOffset, int positionOffsetPixels) {
Log.e("DEBUG-WCL", "position: " + position + ", positionOffset: " + positionOffset);
// 以前滑动, 现在终止
if (isFinishedScrolling(position, positionOffset)) {
finishScroll(position);
}
// 判断前后滑动
if (isStartingScrollToPrevious(position, positionOffset)) {
startScroll(position);
} else if (isStartingScrollToNext(position, positionOffset)) {
startScroll(position + 1); // 向后滚动需要加1
}
// 向后滚动
if (isScrollingToNext(position, positionOffset)) {
mImageAnimator.forward(positionOffset);
} else if (isScrollingToPrevious(position, positionOffset)) { // 向前滚动
mImageAnimator.backwards(positionOffset);
}
}
/**
* 终止滑动
* 滑动 && [偏移是0&&滑动终点] || 动画之中
*
* @param position 位置
* @param positionOffset 偏移量
* @return 终止滑动
*/
public boolean isFinishedScrolling(int position, float positionOffset) {
return mIsScrolling && (positionOffset == 0f && position == mFinalPosition);
}
/**
* 从静止到开始滑动, 下一个
* 未滑动 && 位置是当前位置 && 偏移量不是0
*
* @param position 位置
* @param positionOffset 偏移量
* @return 是否
*/
private boolean isStartingScrollToNext(int position, float positionOffset) {
return !mIsScrolling && position == mCurrentPosition && positionOffset != 0f;
}
/**
* 从静止到开始滑动, 前一个[position会-1]
*
* @param position 位置
* @param positionOffset 偏移量
* @return 是否
*/
private boolean isStartingScrollToPrevious(int position, float positionOffset) {
return !mIsScrolling && position != mCurrentPosition && positionOffset != 0f;
}
/**
* 开始滚动, 向后
*
* @param position 位置
* @param positionOffset 偏移
* @return 是否
*/
private boolean isScrollingToNext(int position, float positionOffset) {
return mIsScrolling && position == mCurrentPosition && positionOffset != 0f;
}
/**
* 开始滚动, 向前
*
* @param position 位置
* @param positionOffset 偏移
* @return 是否
*/
private boolean isScrollingToPrevious(int position, float positionOffset) {
return mIsScrolling && position != mCurrentPosition && positionOffset != 0f;
}
/**
* 开始滑动
* 滚动开始, 结束位置是position[前滚时position会自动减一], 动画从当前位置到结束位置.
*
* @param position 滚动结束之后的位置
*/
private void startScroll(int position) {
mIsScrolling = true;
mFinalPosition = position;
// 开始滚动动画
mImageAnimator.start(mCurrentPosition, position);
}
/**
* 如果正在滚动, 结束时, 固定position位置, 停止滚动, 调动截止动画
*
* @param position 位置
*/
private void finishScroll(int position) {
if (mIsScrolling) {
mCurrentPosition = position;
mIsScrolling = false;
mImageAnimator.end(position);
}
}
public void onPageScrollStateChanged(int state) {
//NO-OP
}
public void onPageSelected(int position) {
if (!mIsScrolling) {
mIsScrolling = true;
mFinalPosition = position;
mImageAnimator.start(mCurrentPosition, position);
}
}
}
详细内容参见注释
ViewPager添加滚动监听.1
2
3SimpleAdapter adapter = new SimpleAdapter(getSupportFragmentManager());
mVpContainer.setAdapter(adapter);
mVpContainer.addOnPageChangeListener(PagerChangeListener.newInstance(adapter, mIvTarget, mIvOutgoing));
页面滚动
在ViewPager上, 嵌套NestedScrollView.1
2
3
4
5
6
7
8
9
10
11
12
13
14<android.support.v4.widget.NestedScrollView
android:layout_width="match_parent"
android:layout_height="match_parent"
android:fillViewport="true"
android:scrollbars="none"
app:layout_behavior="@string/appbar_scrolling_view_behavior">
<android.support.v4.view.ViewPager
    android:id="@+id/main_vp_container"
    android:layout_width="match_parent"
    android:layout_height="match_parent"
    app:layout_behavior="@string/appbar_scrolling_view_behavior"/>
</android.support.v4.widget.NestedScrollView>
android:fillViewport允许ScrollView内的组件填充, 否则ViewPager显示.
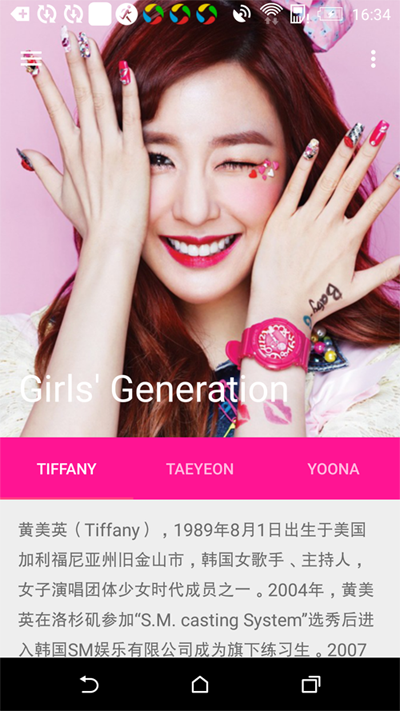
设置标题, MainActivity.1
setTitle("Girls' Generation");
动画效果
偏移滚动
额, 与其说是AppBar, 不如说是ViewPager, 再添加一些动画效果, 和修复Bug.
把图片的左右10%, 隐藏起来, 滑动时, 一边渐变一边侧移.
在app_bar_main中, 替换FrameLayout为PercentFrameLayout, 宽度设置为120%.1
2
3
4
5
6
7
8
9
10
11
12
13
14
15
16
17
18
19
20
21
22
23
24
25
26
27
28
29
30
31
32<android.support.percent.PercentFrameLayout
android:layout_width="match_parent"
android:layout_height="wrap_content"
android:layout_gravity="center_horizontal"
android:fitsSystemWindows="true"
app:layout_collapseMode="parallax">
<ImageView
android:id="@+id/toolbar_iv_outgoing"
android:layout_width="0dp"
android:layout_height="wrap_content"
android:layout_gravity="center_horizontal"
android:adjustViewBounds="true"
android:contentDescription="@null"
android:scaleType="centerCrop"
android:visibility="gone"
app:layout_widthPercent="120%"/>
<ImageView
android:id="@+id/toolbar_iv_target"
android:layout_width="0dp"
android:layout_height="wrap_content"
android:layout_gravity="center_horizontal"
android:adjustViewBounds="true"
android:contentDescription="@null"
android:fitsSystemWindows="true"
android:scaleType="centerCrop"
android:src="@drawable/tiffany"
app:layout_collapseMode="parallax"
app:layout_widthPercent="120%"/>
</android.support.percent.PercentFrameLayout>
修改滑动动画(Image), 在向前向后滑动时, setTranslationXX轴平移.1
2
3
4
5
6
7
8
9
10
11
12
13
14
15
16
17
18
19
20
21
22
23
24
25
26
27
28
29
30
31
32
33
34
35
36
37
38
39
40
41
42
43
44
45
46
47
48
49
50
51
52
53
54
55
56
57
58
59
60
61
62
63
64
65
66
67
68
69
70
71
72
73
74
75
76
77
78
79
80
81
82
83
84
85
86
87
88
89
90
91
92
93
94
95
96/**
* 渐变的动画效果
* <p/>
* Created by wangchenlong on 15/11/9.
*/
public class ImageAnimator {
private static final float FACTOR = 0.1f;
private final SimpleAdapter mAdapter; // 适配器
private final ImageView mTargetImage; // 原始图片
private final ImageView mOutgoingImage; // 渐变图片
private int mActualStart; // 实际起始位置
private int mStart;
private int mEnd;
public ImageAnimator(SimpleAdapter adapter, ImageView targetImage, ImageView outgoingImage) {
mAdapter = adapter;
mTargetImage = targetImage;
mOutgoingImage = outgoingImage;
}
/**
* 启动动画, 之后选择向前或向后滑动
*
* @param startPosition 起始位置
* @param endPosition 终止位置
*/
public void start(int startPosition, int endPosition) {
mActualStart = startPosition;
// 终止位置的图片
int incomeId = mAdapter.getDrawable(endPosition);
// 原始图片
mOutgoingImage.setImageDrawable(mTargetImage.getDrawable()); // 原始的图片
// 起始图片
mOutgoingImage.setTranslationX(0f);
mOutgoingImage.setVisibility(View.VISIBLE);
mOutgoingImage.setAlpha(1.0f);
// 目标图片
mTargetImage.setImageResource(incomeId);
mStart = Math.min(startPosition, endPosition);
mEnd = Math.max(startPosition, endPosition);
}
/**
* 滑动结束的动画效果
*
* @param endPosition 滑动位置
*/
public void end(int endPosition) {
int incomeId = mAdapter.getDrawable(endPosition);
mTargetImage.setTranslationX(0f);
// 设置原始图片
if (endPosition == mActualStart) {
mTargetImage.setImageDrawable(mOutgoingImage.getDrawable());
} else {
mTargetImage.setImageResource(incomeId);
mTargetImage.setAlpha(1f);
mOutgoingImage.setVisibility(View.GONE);
}
}
// 向前滚动, 比如0->1, offset滚动的距离(0->1), 目标渐渐淡出
public void forward(float positionOffset) {
Log.e("DEBUG-WCL", "forward-positionOffset: " + positionOffset);
int width = mTargetImage.getWidth();
mOutgoingImage.setTranslationX(-positionOffset * (FACTOR * width));
mTargetImage.setTranslationX((1 - positionOffset) * (FACTOR * width));
mTargetImage.setAlpha(positionOffset);
}
// 向后滚动, 比如1->0, offset滚动的距离(1->0), 目标渐渐淡入
public void backwards(float positionOffset) {
Log.e("DEBUG-WCL", "backwards-positionOffset: " + positionOffset);
int width = mTargetImage.getWidth();
mOutgoingImage.setTranslationX((1 - positionOffset) * (FACTOR * width));
mTargetImage.setTranslationX(-(positionOffset) * (FACTOR * width));
mTargetImage.setAlpha(1 - positionOffset);
}
// 判断停止
public boolean isWithin(int position) {
return position >= mStart && position < mEnd;
}
}
修复滚动Bug, 连续滚动时, 及时更新当前图片, 否则图片异常.
1 | /** |
全部功能都已经完成了. AppBar的知识就这些了.
OK, that’s all! Enjoy it!
原始地址:
http://www.wangchenlong.org/2016/03/22/1603/227-app-bar-first/
欢迎Follow我的GitHub, 关注我的简书, 微博, CSDN, 掘金, Slides.
我已委托“维权骑士”为我的文章进行维权行动. 未经授权, 禁止转载, 授权或合作请留言.